%20a7d76e052cef4897a5c85a0ad1caf8a2/BANNER.png)
C0lddbox_Easy (Mini Project)
Welcome to our mini project on pen-testing Colddbox Easy! In this project, we will guide you through the process of establishing a security lab to identify vulnerabilities and perform security tests on Colddbox Easy.
By following this how-to guide, you will learn how to set up two virtual machines - one for testing and another for acting as a vulnerable system. We will be using VMware Workstation and Oracle Virtual Box to accomplish this. Our testing machine will have Kali Linux installed, while the target system will be Colddbox Easy deployed on Oracle Virtual Box.
With the lab set up, you will be able to test and analyze Colddbox Easy for any potential security risks or vulnerabilities. So, if you are interested in learning more about pen-testing and identifying security flaws, let's dive in and get started!
What is Colddbox Easy?
Colddbox Easy is a Wordpress machine that has been designed with an easy level of difficulty. It is an ideal platform for beginners to perform various tests and identify vulnerabilities. This machine is equipped with a range of features that will help you develop your skills and improve your knowledge of cybersecurity. It is an excellent tool to gain hands-on experience in a safe and controlled environment.
Installing Kali Linux in VMware Workstation
Before we can proceed with deploying Colddbox Easy, we need to install Kali Linux in VMware Workstation. Follow this guide on how to install Kali Linux in VMware Workstation: How to Install Kali Linux in VMware Workstation (Player & Pro).
How to Install Kali Linux in VMware Workstation (Player & Pro)Before we begin, let’s understand the difference between Vmware Workstation player and Vmware Workstation pro….medium.com
Downloading Colddbox Easy and Oracle Virtual Box
Now that we have Kali Linux installed, it’s time to download Colddbox Easy and Oracle Virtual Box. Follow the links below to download both:
- Download Colddbox: Easy [https://www.vulnhub.com/entry/colddbox-easy,586/]
- Download Virtual Box: [https://www.virtualbox.org/wiki/Download_Old_Builds_6_1]
Configuring Colddbox Easy
Let’s explore the configuration of Colddbox Easy. Follow the steps below to do so:
- Open Oracle VirtualBox.
- Select File > Import Appliance.
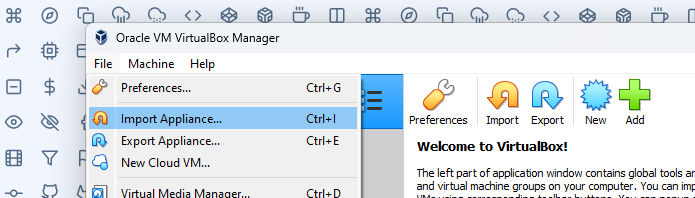
- Click the “Folder” button to browse to the directory where the OVA file was downloaded.
- Click “Next” > Then “Import”.

- After installing, go to “Settings” then browse to “Network” section then change the “Network attached” to Bridged. [Do the similar for VMware Kali Linux]

Ensure all the settings are configured, and then click the “Start” option.

Now that we have successfully configured Colddbox Easy, we can start performing security tests and identifying vulnerabilities. Remember to always conduct these tests in a controlled and safe environment to avoid any potential security risks.
Into The Testing
Penetration testing is a vital process to assess the security of an organization’s systems and applications. In this guide, we will take you through the steps involved in penetration testing, starting with the initial setup and leading up to the brute force attack.

Step 1: Starting Up the Environment
Before we begin, we need to boot up the environment. To do this, we must minimize the currently running ColdBox and launch VMware Workstation. Then, we need to start Kali Linux and open the terminal. Once in the terminal, we will use the following command to find the IP address of the target machine:
sudo netdiscover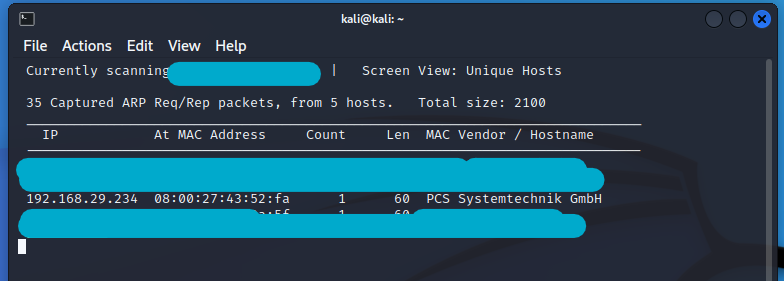
Step 2: Identifying Open Ports and Services
With the IP address of the target machine, the next step is to find out the open ports and services available on the machine. We will use the Nmap tool for this. The command used is:
nmap -p- -sV 192.168.29.234The Nmap output shows that two ports are open: port 80 for HTTP and port 4512 for SSH service. We will start with HTTP port 80.
Step 3: Scanning the Website for Vulnerabilities
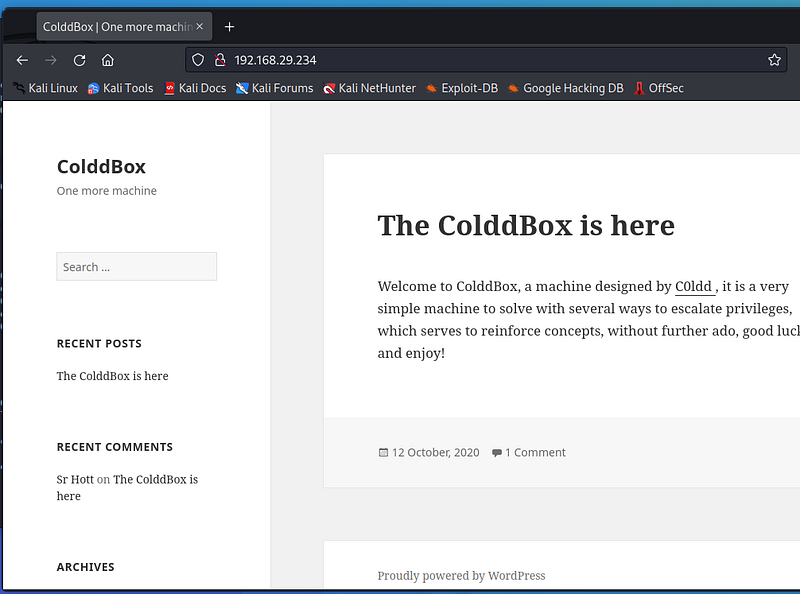
We opened the target machine’s IP address on the browser and found a website running on the HTTP port. A close observation of the website showed that it has been developed in WordPress CMS. We then tried to access the WordPress admin page, but the common username and password combinations did not work.
We decided to run a WordPress vulnerability scanner on the website. The command used is:
wpscan –url <http://192.168.29.234> -e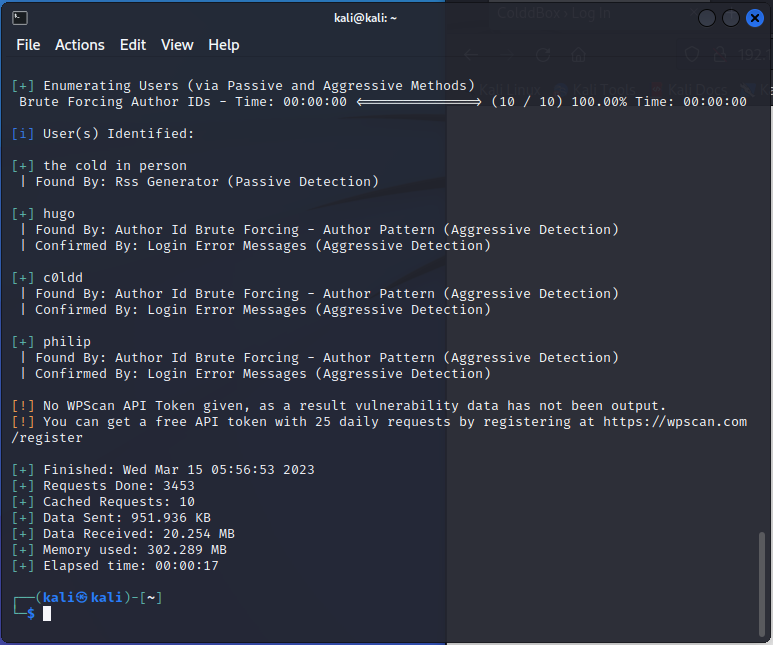
The scanner identified three valid usernames, but we did not know the password. So, in the next step, we will be doing the brute force attack to identify the valid password.
Note
It is important to note that Kali Linux does not come with the rockyou.txt wordlist. To install it, use the following commands:
sudo apt install wordlists
sudo gunzip /usr/share/wordlists/rockyou.txt.gz
wc -l /usr/share/wordlists/rockyou.txt; ls -lah /usr/share/wordlists/rockyou.txtStep 4: Brute Force Attack
We used the WPScanner tool for brute-forcing the password. The command used is:
wpscan –url <http://192.168.29.234> -U c0ldd -P /usr/share/wordlists/rockyou.txt
From this, we found the password to be ‘9876543210’.
Uploading a Reverse Shell & Privilege Escalation
Step 1: Log into the WordPress Admin Dashboard Using the username and password, log into the WordPress admin dashboard.
Step 2: Edit the Source Code of PHP Files While exploring the admin functionality, we found that we can edit the source code of PHP files through the editor. So, we added a simple PHP command shell in the ‘header.php’ file.

Step 3: Use the php-reverse-shell We will be using the php-reverse-shell by pentestmonkey. After taking this reverse-shell, copy it to the header.php file in the WordPress dashboard.
Step 4: Change IP Address and Port In the reverse-shell, we have to change our IP address and port. To do this, use the ifconfig command to find your IP address and update the IP address and change port to 4545.
Step 5: Listen to the Port using Netcat Open your Kali terminal and use the Netcat tool to listen to the port 4545. [You must reload the c0lddbox in your browser to receive a response from netcat.]

Step 6: Use Python Spawned Shell Open the python spawned shell using the command: python3 -c ‘import pty;pty.spawn(“/bin/bash”)’

Step 7: Find the wp-config.php File In the PHP files, the most important one is the wp-config.php file because it contains the username and password for the database. Use the more command to see the file and find the username and password.


Step 8: Find the User.txt File Use the ls command to know what files are in the account. Find the user.txt file and use the cat command to see the content of the file.
Step 9: Decode the Encoded Text From the user.txt file, you may find some encoded text inside of the file. Decode it using your Kali box.
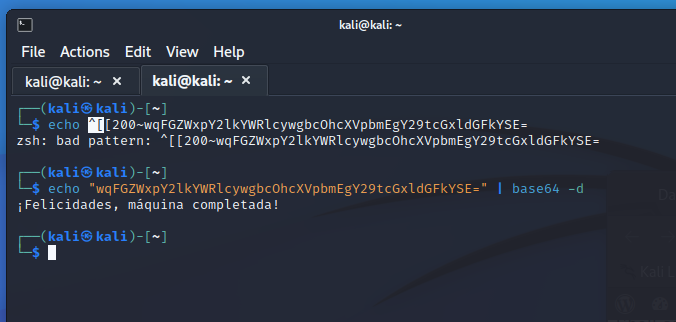
Congratulations! You have successfully hacked!!